Showing posts with label Autumn. Show all posts

Friday, November 2, 2012

Making Bread

Hello friends!
I'm popping in to tell you that we're baking bread today.
As usual, I have a list a mile long of things I want to write about.
For one thing, I think I finally found my china pattern!
I've been married for nearly 15 years, and it's taken me this long to find the one that I really love.
It's vintage Franciscan ware and I can't wait to share it with you.

But back to the bread.
There are few tasks I find more satisfying than making my own bread.
There are few smells more enticing than bread baking in my oven.
There are few things more delicious than bread fresh from my oven, eaten warm with butter.
It is worth every ounce of effort.
And truthfully, it isn't much effort at all.
We tried this recipe for the first time, and mixing it up was a dream.
It's in the oven right now, rising.

Since we'll be having a late dinner tonight, our bread will be ready for us, all warm and delicious, in a couple of hours.
Having fresh baked bread with dinner makes for such a special treat, doesn't it?
I'll let you know how the bread turns out so you can make some too.
I hope you will.
Even if you only do it once a year, your family will thank you for it.
Treat them.
They're worth it!

Can I tell you how wonderful it feels to be turning on my oven and making soup and fresh bread for dinner?
It's November and today was perfectly cool--just a touch under 70.
I know, that's a Southern California autumnal day, but I'll take it.
Last night I baked pumpkin muffins, and tomorrow...who knows.
It's November, one of my favorite months, and I'm thankful for so many things.
Today I'm thankful for the smell of yeast, and the warmth of my oven, and for a family that I am blessed to care for.
It is good to take care of people.
Wishing you a wonderful November weekend!
Love from,
Greta

Monday, November 21, 2011

Thanksgiving Week! How to Make Waxed Leaves

Waxed leaves may be my favorite craft of all time.
They are certainly in the top 5.
We've done them for the past 3 years, even though the ones from the first year are still as good as new.
It is just such a calming, meditative, lovely act; dipping the leaves and freezing a moment of beauty.


Yes, even when you're doing it with kids.
Which I am.
So in case you missed the post last year, or the year before, here's the how-to.
Waxed leaves.


First, collect your leaves.
We use mostly leaves from the Sweet Gum tree (also called Liquid Amber) because those are a colorful leaf in abundance here in so. cal.
Leaves with a long stem work best.
Lay them out on a table top or some other flat surface.


Cover them with books to flatten.
You only have to do this for a few hours or at the longest, overnight.
Any longer and they will start to dry out.
You want them to remain pliable.
Or, if you want to capture the shape of your leaves as they begin to curl, leave them out overnight on the table with nothing on top.
They'll be a little more fragile this way, but still very beautiful.


Get your wax.
I found this wax at the hardware store.
1 box has lasted me 3 years.
You gotta love a cheap craft.


Use an old pan or one of those disposable ones you find this time of year at the grocery store to melt your wax in.
Square or rectangular is a better shape than circular.
You want it rather wide and shallow.
The wax you see in the pan here, is leftover wax from last year.
I just left it in the pan and stored it.
I added another block this year.


To melt the wax, I use this really fancy system: old pan of wax on top of another pan of boiling water.
The wax melts fast.
Keep the water on a simmer on the stove so you can reheat the wax as you're dipping leaves.


After a little talk about hot wax and its sticking qualities, I gave the kids a tutorial and they got to dipping.


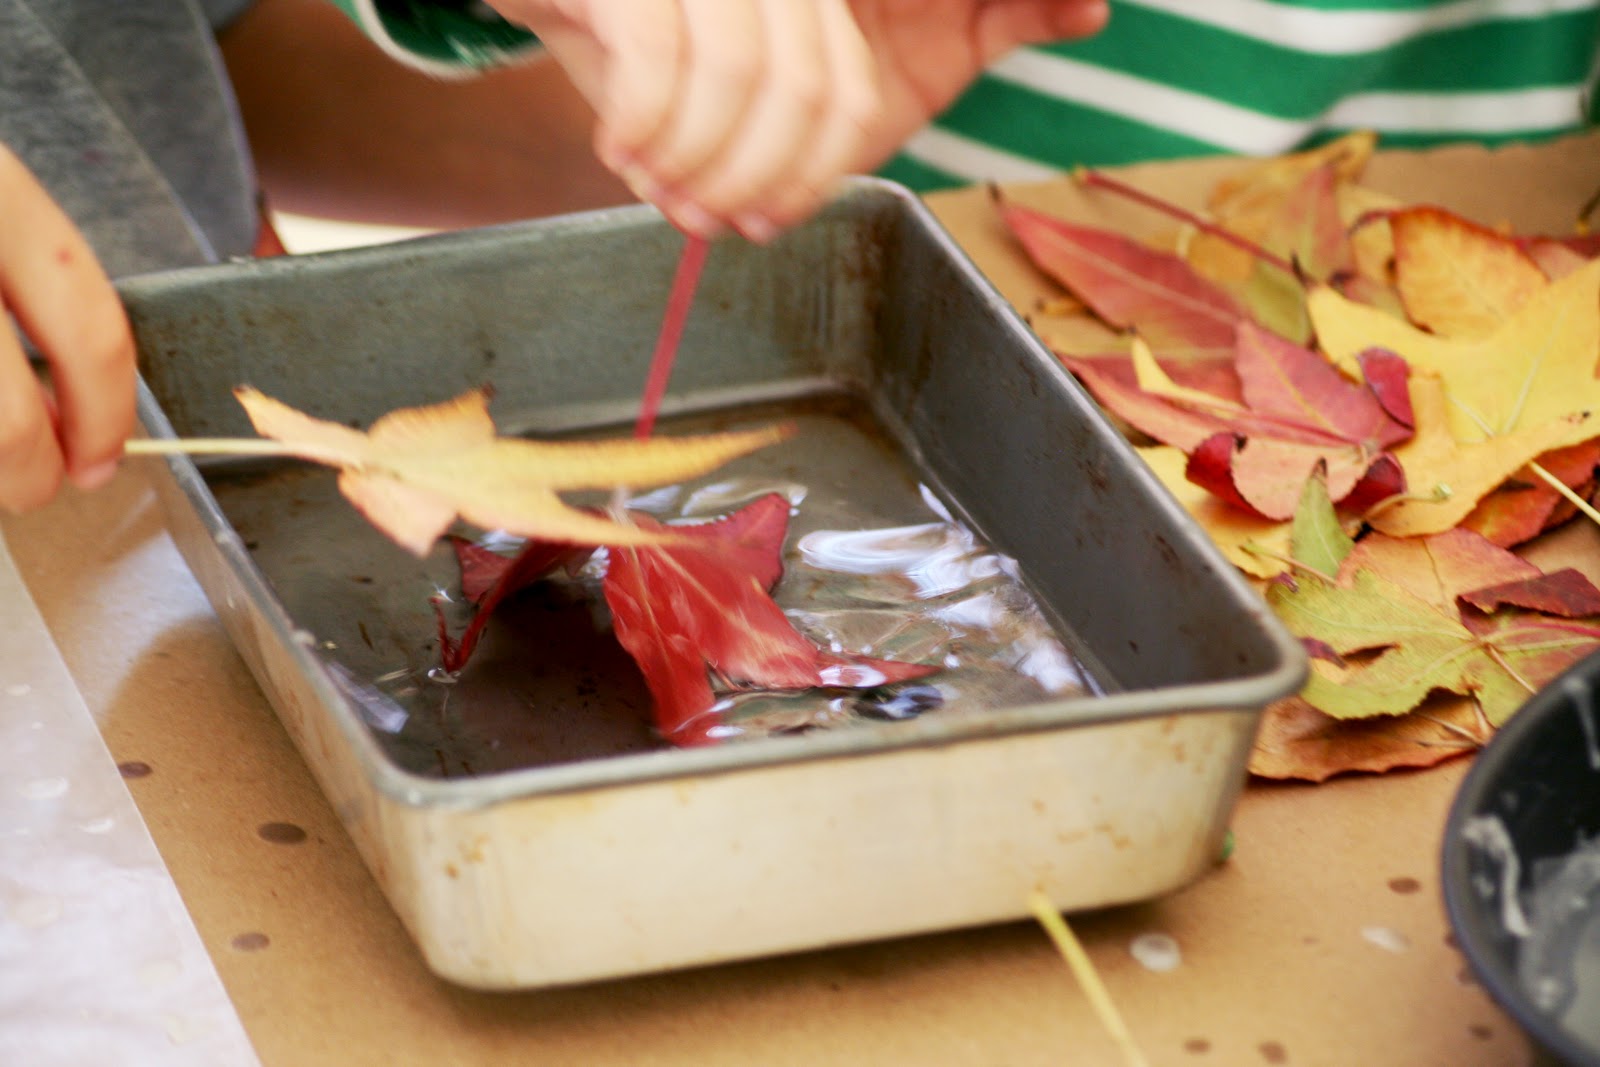
The best method for perfect leaves is to gently lay the leaf in the wax.
Swirl it softly to cover both top and bottom with wax.
Don't leave the leaf in too long or the wax will get clumpy.
Slowly lift the leaf from the wax and let it drip for a moment.


Lay it on waxed paper and let it dry.
Every so often you will have to put your wax back on the pot of hot water to reheat.
If you let it get even the tiniest bit cold, the wax will clump and you'll get some really ugly leaves.
I had to reheat our wax multiple times during this dipping session.
The air temp in the house must have been pretty cool.


It's fun to identify the leaves you are dipping.
I picked up our tree book at a used book sale for a dollar.


Isn't this leaf beautiful?


Last fall my friend Alicia went to Paris for a week.
Just her and a girlfriend.
I almost had to stop being her friend for this.
But I swallowed my jealousy (mostly) and was happy for her.
While there she collected leaves and brought them home.


Hello, coolest souvenir ever!
This one was one of her favorites.
We waxed it.
It turned out beautiful.


There are lots of things you can do with waxed leaves.
I've used them like a runner for my Thanksgiving table.


My friend, Jen, used giant leaves from the California Sycamore and hung them from a big branch.
It had an almost sculptural effect.


My favorite thing to do, of course, is to string the leaves and make a garland.
Simple and beautiful.


I know many of you are already putting up Christmas decorations.
But if you need some extra Thanksgiving decor, or your kids need a craft to do one afternoon this week, this is your project!
Or, you can just pin it for next year.
Tomorrow I'll be sharing easy, homemade rolls for your Thanksgiving dinner.
See you then.
Love from,
Greta
PS Just remembered this post from my fried, Andrea.  Her waxed leaf garland is fancier than mine.  Go see, for her take on waxed leaves.

Sunday, November 6, 2011

Home

Unlike the rest of the world, I am not the biggest fan of fall.
And winter, all that cold, really, really not a fan.
Give me spring and then give me summer.
Lots of summer.
You know this quote?  
Well, I agree 100%.
But.


This weekend it turned cold here. 
(cold for Southern California is a day time temp of 57--we're talking scarves and heavy coats. brrrr.)
And daylight savings time ended.
It was dark at 5 pm.
Tonight, coming in from the cold and dark, my home welcomed me.
There was golden light.
And warm air embraced me.
It felt so good to be home.
And suddenly, I was so thankful for the things I don't like, because they made me appreciate the things I take for granted.
HOME.
How blessed I am to have a home.
Where I am safe.
Where I am warm.
Where there is food.
Where there is comfort.
Where there is love.
Where there is light.
Where there is laughter.
Where I am happy.
Where I am with the ones I love best of all.
Home.
Oh, how I love my home.

I like the last 2 verses of this poem we all know a part of, Home Sweet Home, by John Howard Payne.
How sweet 'tis to sit 'neath a fond father's smile,
And the caress of a mother to soothe and beguile!
Let others delight mid new pleasures to roam,
But give me, oh, give me, the pleasures of home.
Home, home, sweet, sweet home!
There's no place like home, oh, there's no place like home!

To thee I'll return, overburdened with care;
The heart's dearest solace will smile on me there;
No more from that cottage again will I roam;
Be it ever so humble, there's no place like home.
Home, home, sweet, sweet, home!
There's no place like home, oh, there's no place like home! 
.................................................................................................
November is one of my favorite months--despite it being fall, I still love it.
I love it because many of us remember, more than any other time of year, to be thankful.
I don't know yet what I'm supposed to do with this moment of gratefulness that was thrust upon me.
But I want to remember it.
I want to remember my windows lit up with the glow of warmth and light.
I want to do something with that.

This quote is speaking to me right now.
"At the end of life we will not be judged by how many diplomas we have received, how much money we have made, how many great things we have done.
We will be judged by "I was hungry, and you gave me something to eat, I was naked and you clothed me. I was homeless, and you took me in
."  Mother Teresa

Feeling grateful for so much right now.
And feeling challenged.
Happy November, friends.
Happy Thanksgiving.
Love from,
Greta

Wednesday, November 24, 2010

Learning To Let Go

The past few months have not been the easiest for me.  There has been personal turmoil, and its accompanying stress, and emotional upheaval.  Then the wonderful news of another baby followed by the sickness, fatigue and emotional upheaval that accompany a new pregnancy.
To put it mildly, there have been lots of days when I have been barely hanging on.

If there is energy to be had, it will be spent on my kids.  We do our weekly field trips, baking, school work, swimming lessons or what have you, and then I am about done for the day.  I muddle through the rest of the day and hit the couch when Aaron comes home.

That really used to bother me.
I hate spending every evening lying on the couch.
There are so many things that need to get done.
So many things I want to get done.
But I am learning to let go.

I am learning what matters.  
I am learning that I feel a lot better about life if I give time to my kids instead of getting the house tidy.  
I am not saying it is easy.
Because I really like a clean house.
And I really like to write on this blog.
And I really like to cook dinner for my family and not give them cereal.
And I really like to feel good.
But those things will come again.

And so will time for making things like these leaves.


I found these a few weeks ago when I was researching decorations for fall.  
I thought I'd actually get something done for Thanksgiving.
Well, I didn't.
Just tonight James asked me, "Mommy, shouldn't we decorate or something for Thanksgiving?"
15 people are coming for dinner tomorrow and I haven't done a thing.
Not a blessed thing.
I've wanted to.
I wanted to make new napkins, and waxed leaves and paint trim and make a cranberry tart.
But I just haven't been able to do it.
But it really doesn't matter.
I got the turkeys, the boys made turkey hand print decorations today and tomorrow will be wonderful.
I am learning to let go.


But I still love these leaves.  (aren't the colors and the stitching gorgeous?)
They are felt and just about the coolest I have ever seen.
I am saving them for next fall.
Cause I will totally have time and energy for crafting then.  
You know, with my infant and my other 3 kids and sleep deprivation and home schooling.
Here is the link if you want to save it for next fall as well.
There are lots more fantastic pictures of the leaves to further inspire you.


Even without the felt leaves, I am looking forward to hosting dinner tomorrow.
I am thankful for the opportunity to cherish the things that really matter in my life.
Enjoy your time with loved ones tomorrow.
Happy Thanksgiving.
Love from,
Greta


PS.  If you need a last minute roll recipe for tomorrow, I've got you covered.  
I made them last year, and I am making them again this year. 
First thing in the morning when I feel good.
They are very, very good and easy too.
You might want to give them a try.
Here's the link for all the info.
Happy Thanksgiving!

Tuesday, November 2, 2010

More Waxed Leaf Crafting

Well it seems waxed leaves have been a big hit.  
I have been happily surprised at how many people decided to give it a try.
And I have been happy to see their own spin on it.
Like my friend, Jen.
I was at her house on Friday and snapped a few pictures of her own take on the waxed leaves crafts.
Just look at her magic.


I just love that she used some really big leaves along with her smaller Liquid Amber leaves.  (just learned the Liquid Amber is also called Sweet Gum.  never knew that) 
The big leaves are from the California Sycamore.  


I also love that she tied them to a fallen branch she and her boys discovered on a walk.  What a beautiful, natural way to display her leaves.


Here is a picture of the all of it in its autumnal glory.
I love it.
If you want to see other ways Jen uses branches to decorate, check out her blog here.
And if you made waxed leaves, send me word so I can link you up.  I'd love to see what you create.

Despite our 90 degree heat today, my boys are fired up about decorating for Thanksgiving and the rest of fall.  So we'll be doing some leaf hunting and waxing of our own soon.
Hope you are enjoying fall days, however warm or cold they may be, where ever you are.
Love from,
Greta

Sunday, October 31, 2010

How To: Roast Your Own Pumpkin Seeds

Perhaps you don't need to know how to roast your own pumpkin seeds because, after all, today is Halloween and you carved your pumpkins long ago.
But we're running a bit behind schedule this year.
I am 6 weeks pregnant, tired beyond belief and sick as a dog.  Halloween preparations have been low on the priority list the past couple of weeks.
In addition, we seem to have been struck by some mysterious flu bug, working its way through the family this weekend.  People seem to be awfully sick for about 12 hours and then feel amazingly better.
Needless to say, Halloween preparations have been low on the list this weekend.

But this morning while Daddy was sick and still asleep, and Lilly, just starting to feel bad, was laying on the couch watching Peter Pan, James, William and I carved the pumpkins.  Pumpkins just purchased yesterday.  Better late than never, and just as much fun as it always is.

I love to carve pumpkins.  Besides costumes, it is the best part of Halloween.  I don't go in much for the spooky stuff, scary movies and all the store bought decorations.  But a glowing jack o lantern is something I love.  
And I have, for as long as I can remember.  
See that pumpkin carving knife?  We had one just like it when I was a kid.  It was just for carving pumpkins and I loved using it year after year.  This might even be the same knife.  Maybe my mom gave it to me when I grew up and moved out?  She does that sometimes


And each year, we scooped the goop out of our pumpkins and saved it all in a bowl.
Once the pumpkins were carved, we washed the seeds free of their pumpkin slime, or as clean as we could get them cause some of that stuff never comes off, then set them on paper towels to dry a bit.
Then we'd oil, salt and pop them in the oven to roast them.
The smell of roasting pumpkin seeds is fantastic.


I still roast pumpkin seeds every year.  Even this one.
Because it is just so easy and worthwhile.
Not to mention they are incredibly delicious.


As soon as they came out of the oven, I enjoyed a plate full.  If I liked beer, and if I wasn't pregnant, I am sure they'd taste perfect with a tall, cold glass of beer.  I tried them with root beer and it was pretty wonderful.


Even if you threw out your seeds long ago, bookmark this for next year, or make some for a Thanksgiving appetizer.  Pumpkins work beyond Halloween, you know.

Simple Roasted Pumpkin Seeds

Empty a fresh pumpkin of all its seeds.
Wash seeds in a large bowl of water and clean off as much pumpkin "slime" as you can.
Drain seeds in a colander and rinse a bit under cold, running water.
Lay pumpkin seeds in a single layer on dry paper towels.
Let dry for at least an hour.
Put seeds in a bowl and drizzle with enough olive oil to coat each seed.  (I don't measure--but I'd guess at least at least a table spoon or 2)
Sprinkle generously with kosher salt (please, please use kosher or sea salt--it tastes so much better than regular table salt)
I also like to sprinkle with a bit of paprika.  I think it looks pretty.
Give the seeds a good stir and then pour in a single layer of a cookie sheet. (I find my baking stone works really well for this, but a regular cookie sheet works fine too.)
Roast in a 400 degree oven for 20-30 minutes.  
Do not over cook, as the seeds will all taste bad if they are the slightest bit burnt.
Wait as long as you can for them to cool (about 1 minute for me)  and then, enjoy!

....................................................................
Confession: For a very long time, I did not realize you were not supposed to eat the shell of pumpkin seeds.  I don't know why I didn't know this.  I don't eat the shells of sunflower seeds.
Maybe it's because when you roast your own pumpkin seeds, the shell is quite soft and goes down very easily.  It doesn't really taste like a shell to me at all.  A little extra fiber, right?
But Aaron thinks I am crazy.
All the more for me, I say.

Happy Halloween everyone!
Love from,
Greta

Tuesday, October 26, 2010

Favorite Recipe: Pumpkin Bread

I've been reading a lot of posts on Facebook about people baking pumpkin bread.  It seems like it is a favorite thing to bake at this time of year.
Since so many people are baking it, I assume everyone has their own favorite recipe.  Or they are just using a boxed mix, and I am not even going to mention how I feel about that.
Instead, I am going to share my favorite pumpkin bread recipe with you.  It is the one my mom has been making for years.  Like 40 years.  It has stood the test of time.  
One of the reasons it was a favorite in our family was that it doesn't have any dairy in it.  My brother is allergic to dairy and that left him out of a lot of desserts.  When we'd go out for ice cream, he'd get a plain cone.  Poor guy.
But this bread he could have.  
And when I was breast feeding my second son and couldn't have dairy because it made him sick, this bread was a favorite of mine.
The lack of dairy doesn't make this cake dry or tasteless.  In fact, I notice a lot of quick breads use oil instead of dairy.  It is moist and light and the addition of cloves, cinnamon and nutmeg give it a very nice, spicy flavor.
It is just right for breakfast, a mid morning snack, an afternoon snack with tea or for dessert with coffee.
Really, you just need to whip up a batch--it doesn't take long--and enjoy some tomorrow.

Find the recipe at the bottom of post.
Here are a few notes first.

For the first time, I changed my mom's recipe and added something new.
Chocolate chips.


It was a rip roaring success.
I totally recommend it.
See?


I usually make the bread in one loaf pan and the rest in muffin tins.  I like the portability of muffins and being able to give the kids a muffin and not cut a piece off the loaf.  If you don't understand why that is important, you probably don't have kids.
But I also love to make quick bread and give them away.  I found the perfect tin for this a few weeks ago.  It makes 8, individual mini loafs.  They are so cute.


Also, they are perfect for giving away.  I can always think of someone who'd like a fresh from the oven loaf of goodness.
We wrapped ours up in parchment paper and a cute ribbon and gave them to some neighbors.  The ones who collected our mail for us while we were on vacation, even though we forgot to ask them to, and the other neighbors who just had a baby.


Hope you are now inspired to bake up a batch yourself.
Here's the recipe.

Lillian's Famous Pumpkin Bread

Preheat oven to 325
Gather ingredients:
2 cups sugar
1 cup vegetable oil
3 eggs
2 cups pumpkin (I use canned, but want to try the real deal this year)
3 cups flour
1/2 teaspoon salt
1/2 teaspoon baking powder
1 teaspoon baking soda
1 teaspoon cloves
1 teaspoon cinnamon
1 teaspoon nutmeg
1 bag of semi sweet chocolate chips optional

In a large bowl, beat together sugar and oil
Add eggs, one at a time
Add pumpkin
Sift together flour, salt, baking powder, baking soda and all spices.
Add to wet mixture and stir until just combined.
If using, stir in chocolate chips.

Pour into 2 greased loaf pans and bake for about an hour or until toothpick inserted into center of loaf comes out clean.
If baking in muffin tins or mini loaf pans, bake 20-30 minutes and check often.

Enjoy your baking and your bread.
Love from,
Greta

Friday, October 22, 2010

Fall Craft Project: Waxed Leaves

Last year we tried a new craft--waxed leaves.  It was one of my favorites and I can't wait for enough leaves to turn here so that we can make them again.
I posted the entire project after we did it, but it was after Thanksgiving and in the Christmas rush, it might have been lost.  So I am posting a few of my favorite photos here, and you can get the tutorial here.


You start by gathering, and then pressing lovely fall leaves.  These are Liquid Amber leaves.  They have one of the most vibrant fall displays of all the trees in our neck of the woods.


Melt your wax and dip the leaves one by one.  The kids can help.


Enjoy their shine as you let them dry.


You can then use them for decorating around the house.  They make a lovely "runner".


But my favorite way to use them is to string them on some embroidery floss for a beautiful fall garland.


I have a love affair with garlands and always enjoy coming up with a new one.
Remember, you can get the full instructions here.
Maybe a little bit of leaf hunting will be a part of your weekend plans?
Love from,
Greta