
Waxed leaves may be my favorite craft of all time.
They are certainly in the top 5.
We've done them for the past 3 years, even though the ones from the first year are still as good as new.
It is just such a calming, meditative, lovely act; dipping the leaves and freezing a moment of beauty.

Yes, even when you're doing it with kids.
Which I am.
So in case you missed the post last year, or the year before, here's the how-to.
Waxed leaves.
First, collect your leaves.
We use mostly leaves from the Sweet Gum tree (also called Liquid Amber) because those are a colorful leaf in abundance here in so. cal.
Leaves with a long stem work best.
Lay them out on a table top or some other flat surface.

Cover them with books to flatten.
You only have to do this for a few hours or at the longest, overnight.
Any longer and they will start to dry out.
You want them to remain pliable.
Or, if you want to capture the shape of your leaves as they begin to curl, leave them out overnight on the table with nothing on top.
They'll be a little more fragile this way, but still very beautiful.

Get your wax.
I found this wax at the hardware store.
1 box has lasted me 3 years.
You gotta love a cheap craft.

Use an old pan or one of those disposable ones you find this time of year at the grocery store to melt your wax in.
Square or rectangular is a better shape than circular.
You want it rather wide and shallow.
The wax you see in the pan here, is leftover wax from last year.
I just left it in the pan and stored it.
I added another block this year.

To melt the wax, I use this really fancy system: old pan of wax on top of another pan of boiling water.
The wax melts fast.
Keep the water on a simmer on the stove so you can reheat the wax as you're dipping leaves.

After a little talk about hot wax and its sticking qualities, I gave the kids a tutorial and they got to dipping.
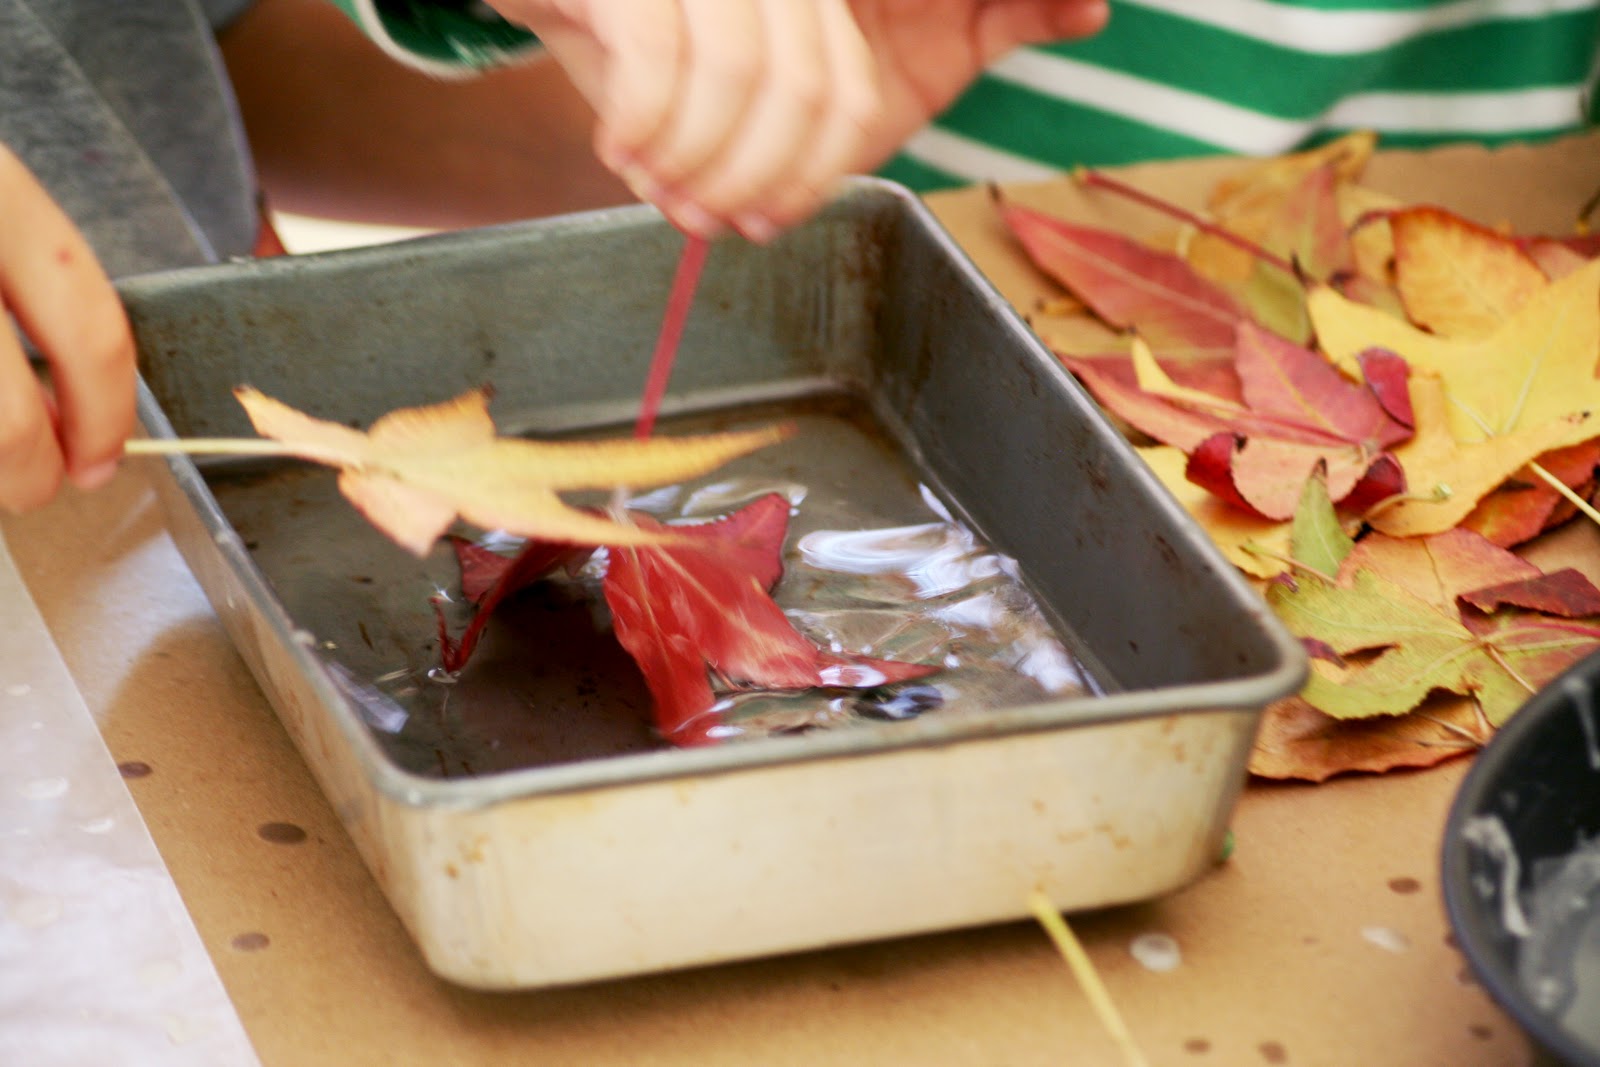
The best method for perfect leaves is to gently lay the leaf in the wax.
Swirl it softly to cover both top and bottom with wax.
Don't leave the leaf in too long or the wax will get clumpy.
Slowly lift the leaf from the wax and let it drip for a moment.

Lay it on waxed paper and let it dry.
Every so often you will have to put your wax back on the pot of hot water to reheat.
If you let it get even the tiniest bit cold, the wax will clump and you'll get some really ugly leaves.
I had to reheat our wax multiple times during this dipping session.
The air temp in the house must have been pretty cool.

It's fun to identify the leaves you are dipping.
I picked up our tree book at a used book sale for a dollar.

Isn't this leaf beautiful?

Last fall my friend Alicia went to Paris for a week.
Just her and a girlfriend.
I almost had to stop being her friend for this.
But I swallowed my jealousy (mostly) and was happy for her.
While there she collected leaves and brought them home.

Hello, coolest souvenir ever!
This one was one of her favorites.
We waxed it.
It turned out beautiful.

There are lots of things you can do with waxed leaves.
I've used them like a runner for my Thanksgiving table.

My friend, Jen, used giant leaves from the California Sycamore and hung them from a big branch.
It had an almost sculptural effect.

My favorite thing to do, of course, is to string the leaves and make a garland.
Simple and beautiful.

I know many of you are already putting up Christmas decorations.
But if you need some extra Thanksgiving decor, or your kids need a craft to do one afternoon this week, this is your project!
Or, you can just pin it for next year.
Tomorrow I'll be sharing easy, homemade rolls for your Thanksgiving dinner.
See you then.
Love from,
Greta


7 comments:
We just did this today! I got the idea from you. : )
these are so cool! i don't know where i have been but i have never, ever heard of this idea before. sooo sad that all our colorado leaves are gone!
Beautiful! I love it.
This is amazing!!!! I LOVE the souvenir idea and the garland! Just awesome. Thanks for sharing!
i have yet to do this, but i'm gonna. your "there are many things you can do with waxed leaves" statement had me laughing and reminded me of that old SNL skit with molly shannon and some other lady, who were radio talk show host. have you seen it? they were pretty funny and would always say "there are many things you can do with...." i know random, but oh well. also about pinning it. can you add a "pin it" button to your blog? i have been pinning alot from you lately. love ya, hope you have a great thanksgiving :)
Hey friend, thanks for the mention on your lovely blog here :) Happy Thanksgiving!
Thanks for the tutorial - love the project and pinned it to try next year :) Thanks again!
Post a Comment